 Here is the unfinished render of Tier... Missing are the wheels, ESC's, drive batts, Rx, weapon belts, and the armor. Here is the unfinished render of Tier... Missing are the wheels, ESC's, drive batts, Rx, weapon belts, and the armor.
 This is the slowly growing POP.. The Cobalt 40's, one VSC, a drive motor, 1/16" Aluminum for the base plate, 3/16" Aluminum for random small machined pieces, and a healthy supply of UHMW from eBay. This is the slowly growing POP.. The Cobalt 40's, one VSC, a drive motor, 1/16" Aluminum for the base plate, 3/16" Aluminum for random small machined pieces, and a healthy supply of UHMW from eBay.
 Here are the first "machined" pieces to come off my mill - The motor mounts for the Cobalts. The bolts will come up through the baseplate, and screw into these pieces, then two muffler clamps will wrap around each mount / motor. Here are the first "machined" pieces to come off my mill - The motor mounts for the Cobalts. The bolts will come up through the baseplate, and screw into these pieces, then two muffler clamps will wrap around each mount / motor.
 Here is all the parts I have so far all put in their relative positions. Missing still is the 1/2" Titanium weapon shaft, the batteries, wheels, and a bunch of other stuff. One month till Motorama... Here is all the parts I have so far all put in their relative positions. Missing still is the 1/2" Titanium weapon shaft, the batteries, wheels, and a bunch of other stuff. One month till Motorama...
 These are the motor mounts I spontaneously made this morning... In this picture, I haven't tapped and drilled the holes yet, and I'm sure you have no idea how they could possibly function as motor mounts. Well, just take my word on it :-) These are the motor mounts I spontaneously made this morning... In this picture, I haven't tapped and drilled the holes yet, and I'm sure you have no idea how they could possibly function as motor mounts. Well, just take my word on it :-)
 Hopefully this picture might clarify the way the mounts work... Basically, a muffler clamp goes in the thin groove, and the motor rests in the wider groove. A bolt then passes through the baseplate and screws into the bottom of the mount. At least that's the plan. Hopefully this picture might clarify the way the mounts work... Basically, a muffler clamp goes in the thin groove, and the motor rests in the wider groove. A bolt then passes through the baseplate and screws into the bottom of the mount. At least that's the plan.
 I trimmed 3" of unneeded material off the baseplate, saving �lb. The bot now measures 18" wide x 9" long. If the cuts in the picture look crooked or rough, it's just you. I assure you, the cuts are perfect :-P I trimmed 3" of unneeded material off the baseplate, saving �lb. The bot now measures 18" wide x 9" long. If the cuts in the picture look crooked or rough, it's just you. I assure you, the cuts are perfect :-P
 When the temperature in the garage finally got back over freezing, I was able to do some work. This pic is of one of the pulleys for the weapon shaft which I bought from McMaster, but since the bore size only came in �", I had to drill it out to �" with my drill press. They didn't come out exactly on center, but look fairly good, considering my lack of a lathe. (The pic was too dark when I took it, so when I lightened it in PSP, it lost some quality, hence the fuzziness) When the temperature in the garage finally got back over freezing, I was able to do some work. This pic is of one of the pulleys for the weapon shaft which I bought from McMaster, but since the bore size only came in �", I had to drill it out to �" with my drill press. They didn't come out exactly on center, but look fairly good, considering my lack of a lathe. (The pic was too dark when I took it, so when I lightened it in PSP, it lost some quality, hence the fuzziness)
 Here's another progress shot... As you can see, I got the Titanium weapon shaft and the pulleys mounted on it... I was still milling the pillow blocks when this pic was taken, so they're not in it. Here's another progress shot... As you can see, I got the Titanium weapon shaft and the pulleys mounted on it... I was still milling the pillow blocks when this pic was taken, so they're not in it.
 Here is $350 of VSC goodness that arrived today. :) They're also part of the reason I'm in debt, though... Oh well.. sacrifices must be made. =P Here is $350 of VSC goodness that arrived today. :) They're also part of the reason I'm in debt, though... Oh well.. sacrifices must be made. =P
 I finally made the pillow blocks, and I think they look pretty snazzy :) I had to "modify" the hole saw to cut the hole for the bearing by removing and/or bending a few of the teeth in so that the bearing would be nice and snug. Mission successful. I finally made the pillow blocks, and I think they look pretty snazzy :) I had to "modify" the hole saw to cut the hole for the bearing by removing and/or bending a few of the teeth in so that the bearing would be nice and snug. Mission successful.
 This is a pretty crummy picture of the.. um.. I guess they're pillow blocks, that I made. There's two 1/4"-20 holes drilled and tapped in the bottom of them to hold them to the baseplate. I also drilled a 7/16" hole for the drive motor shafts to rest in. This is a pretty crummy picture of the.. um.. I guess they're pillow blocks, that I made. There's two 1/4"-20 holes drilled and tapped in the bottom of them to hold them to the baseplate. I also drilled a 7/16" hole for the drive motor shafts to rest in.
 After needing to slowly explain what a "tap" was to a Home Depot employee, I finally found one and was able to drill and tap holes for set screws in all four pulleys for the weapon drive. After needing to slowly explain what a "tap" was to a Home Depot employee, I finally found one and was able to drill and tap holes for set screws in all four pulleys for the weapon drive.
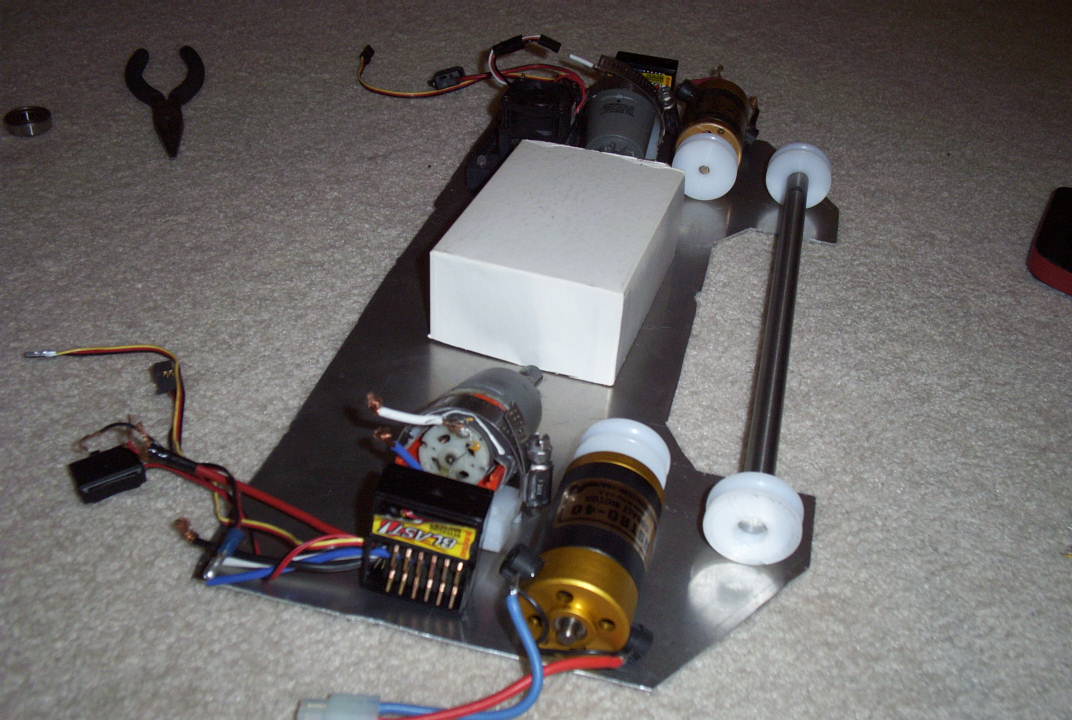
 Here's another one of the boring, repetitive, 'they-all-look-alike' pics of the bot's progress. You can now see the finished pillow blocks for both the weapon and drive systems. Hopefully I should be able to replace the cardboard box with a real battery soon. Here's another one of the boring, repetitive, 'they-all-look-alike' pics of the bot's progress. You can now see the finished pillow blocks for both the weapon and drive systems. Hopefully I should be able to replace the cardboard box with a real battery soon.
 YAY! the K-pack arrived on the same day as the two other McMaster orders. It's like Christmas all over again :) The batt's a wee bit bigger than I expected, but everything should turn out peachy. YAY! the K-pack arrived on the same day as the two other McMaster orders. It's like Christmas all over again :) The batt's a wee bit bigger than I expected, but everything should turn out peachy.
 Today I had a snow day and was able to work on the bot for 5 hours straight. This is a shot from halfway through, with the holes for the motor mounts and pillow blocks drilled. Today I had a snow day and was able to work on the bot for 5 hours straight. This is a shot from halfway through, with the holes for the motor mounts and pillow blocks drilled.
 Here are the five ugliest pieces of Titanium you'll ever see. The discoloration is from the heat the chop saw produces, and the marks are from when I was hammering the annoying scrap thingys off the sides of the cut. (Don't worry... after some filing and polishing, they'll look nice and snazzy for Motorama) Here are the five ugliest pieces of Titanium you'll ever see. The discoloration is from the heat the chop saw produces, and the marks are from when I was hammering the annoying scrap thingys off the sides of the cut. (Don't worry... after some filing and polishing, they'll look nice and snazzy for Motorama)
 The results of my labor: I got the wheels and pillow blocks attached and milled the slots fir the wheels. Tomorrow I should be able to drive it around. (yay!) The results of my labor: I got the wheels and pillow blocks attached and milled the slots fir the wheels. Tomorrow I should be able to drive it around. (yay!)
 This is kind of a pointless picture.. shows the bottom of the baseplate and the holes for the wheels. This is kind of a pointless picture.. shows the bottom of the baseplate and the holes for the wheels.
 This just shows a view of the drive set up. Not much to see, other than a guest appearance by my hand. (applause) This just shows a view of the drive set up. Not much to see, other than a guest appearance by my hand. (applause)
 After an unsuccessful test drive, I realized that Tier would be almost completely undriveable with the stage of gears taken out of the gearboxes, so I decided to put those motors in Hooloovoo and bought some new B&D's at Lowes. After an unsuccessful test drive, I realized that Tier would be almost completely undriveable with the stage of gears taken out of the gearboxes, so I decided to put those motors in Hooloovoo and bought some new B&D's at Lowes.
 After hooking the new B&D's up, I was able to finally take Tier for a successful test-drive. With the wheels so close together, it's able to turn quickly, which will be pretty important, considering I have such crappy armor... After hooking the new B&D's up, I was able to finally take Tier for a successful test-drive. With the wheels so close together, it's able to turn quickly, which will be pretty important, considering I have such crappy armor...
 I finally made the side armor for Tier, cut out of 1/8" Lexan, then used my "sexy Lexan bending" skills to bend them into the right shape :-P I finally made the side armor for Tier, cut out of 1/8" Lexan, then used my "sexy Lexan bending" skills to bend them into the right shape :-P
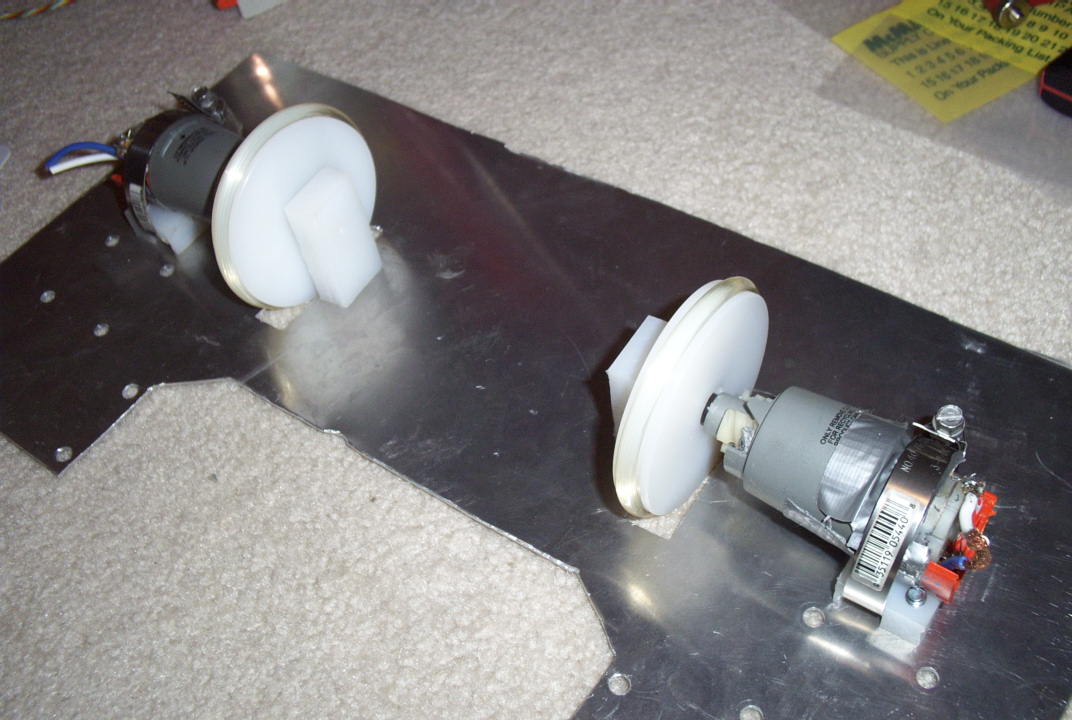
 Here's the armor in place, prior to mounting. Also in this pic, the Cobalts are finally mounted for the first time. Now I just need to get the darn weapon finished... Here's the armor in place, prior to mounting. Also in this pic, the Cobalts are finally mounted for the first time. Now I just need to get the darn weapon finished...
 Using a file and some patience, I was able to put some 1/8" keyways into the teeth. They came out surprisingly well. Using a file and some patience, I was able to put some 1/8" keyways into the teeth. They came out surprisingly well.
 Here you can see the result of one of my random fits of insanity... I bought some 0.025" Aluminum flashing from Home Depot and made some top "armor" out of it. This was quickly pointed out to be a bad idea, so... Here you can see the result of one of my random fits of insanity... I bought some 0.025" Aluminum flashing from Home Depot and made some top "armor" out of it. This was quickly pointed out to be a bad idea, so...
 ...I made this new top out of 1/8" Lexan. Much nicer. It still doesn't line up perfectly... but it's pretty darn close. ...I made this new top out of 1/8" Lexan. Much nicer. It still doesn't line up perfectly... but it's pretty darn close.
|

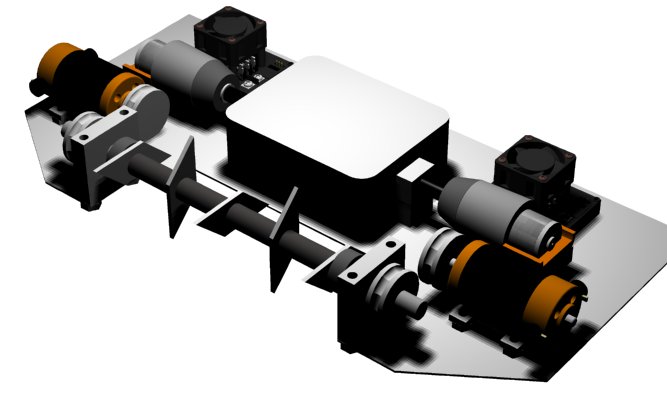 Here is the unfinished render of Tier... Missing are the wheels, ESC's, drive batts, Rx, weapon belts, and the armor.
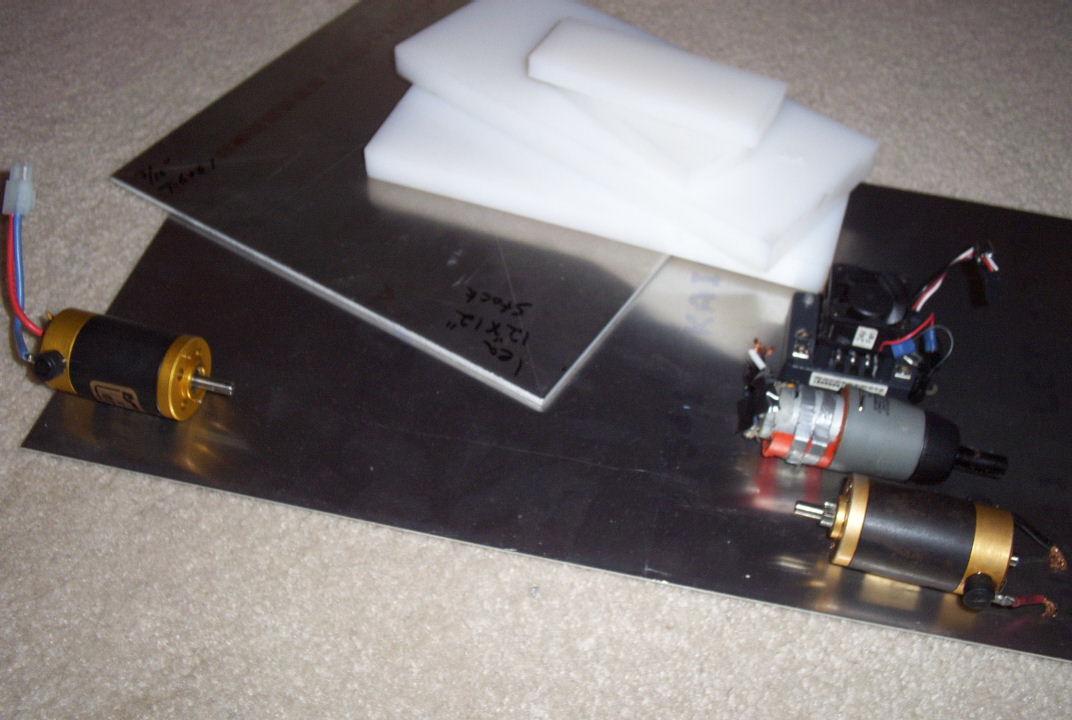 This is the slowly growing POP.. The Cobalt 40's, one VSC, a drive motor, 1/16" Aluminum for the base plate, 3/16" Aluminum for random small machined pieces, and a healthy supply of UHMW from eBay.
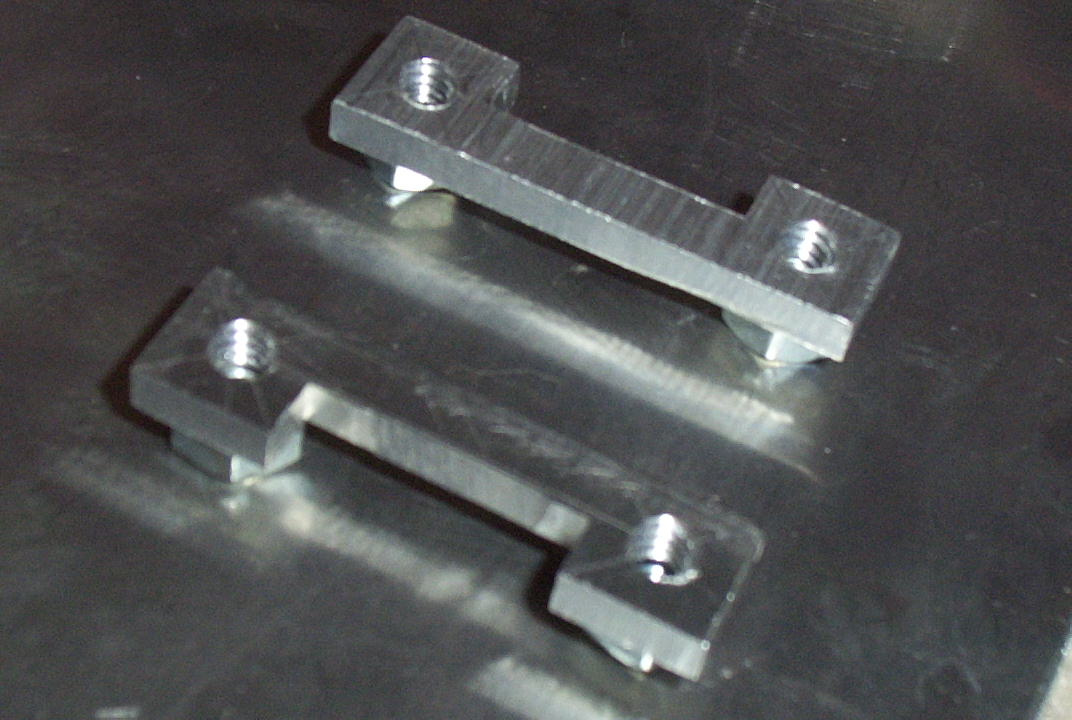 Here are the first "machined" pieces to come off my mill - The motor mounts for the Cobalts. The bolts will come up through the baseplate, and screw into these pieces, then two muffler clamps will wrap around each mount / motor.
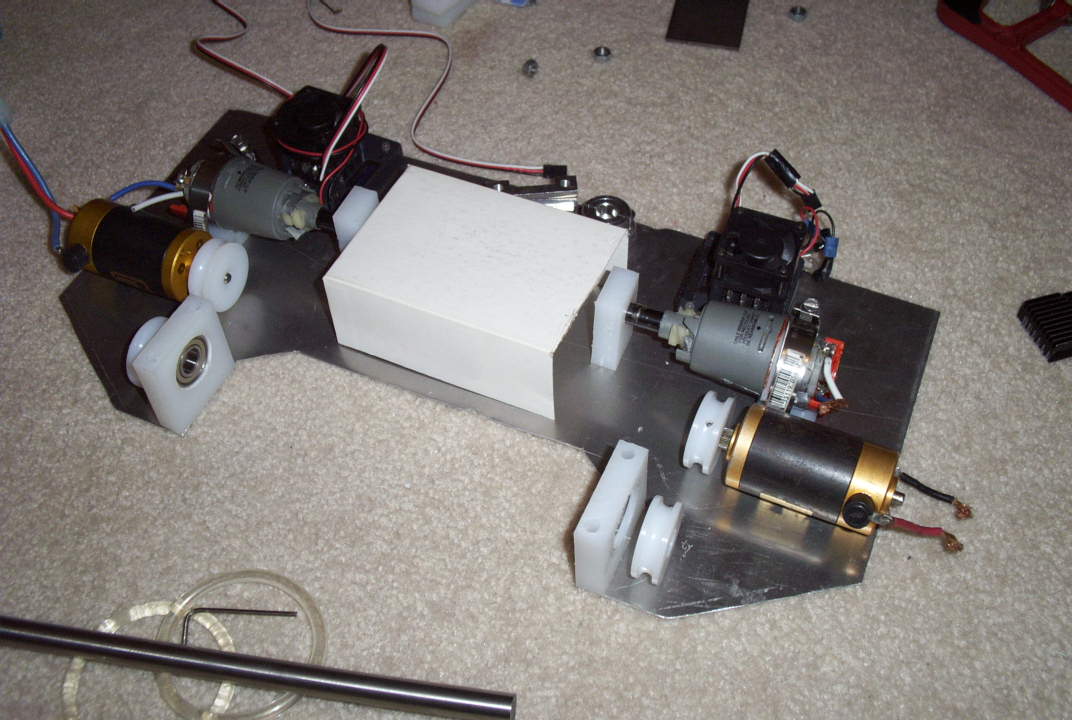
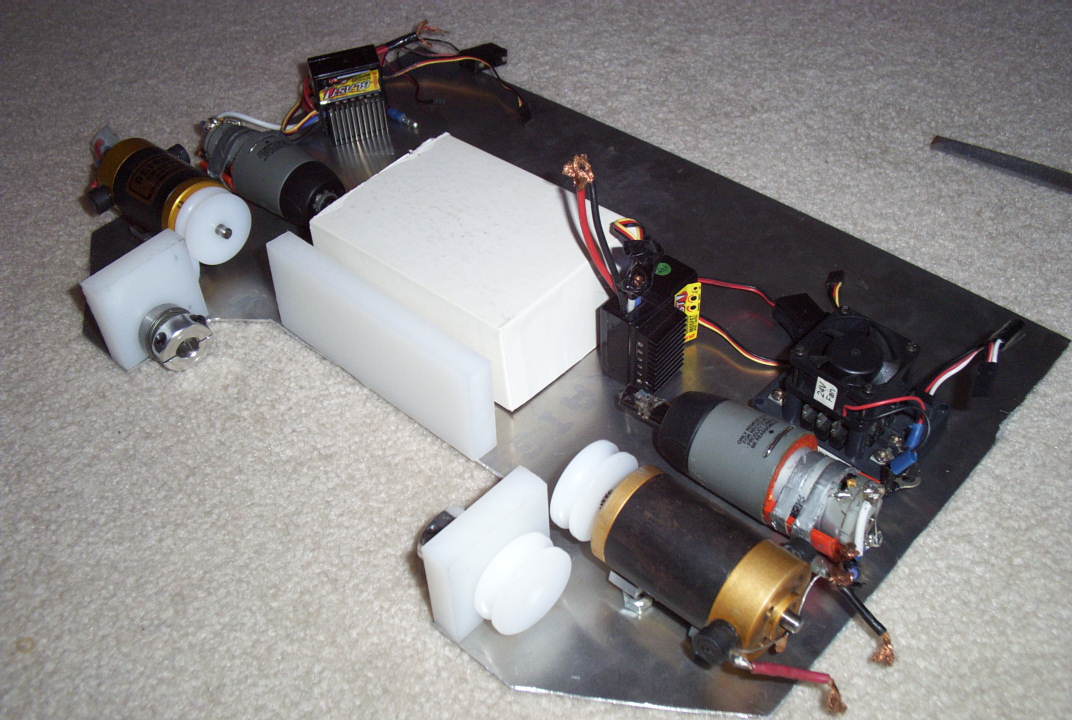 Here is all the parts I have so far all put in their relative positions. Missing still is the 1/2" Titanium weapon shaft, the batteries, wheels, and a bunch of other stuff. One month till Motorama...
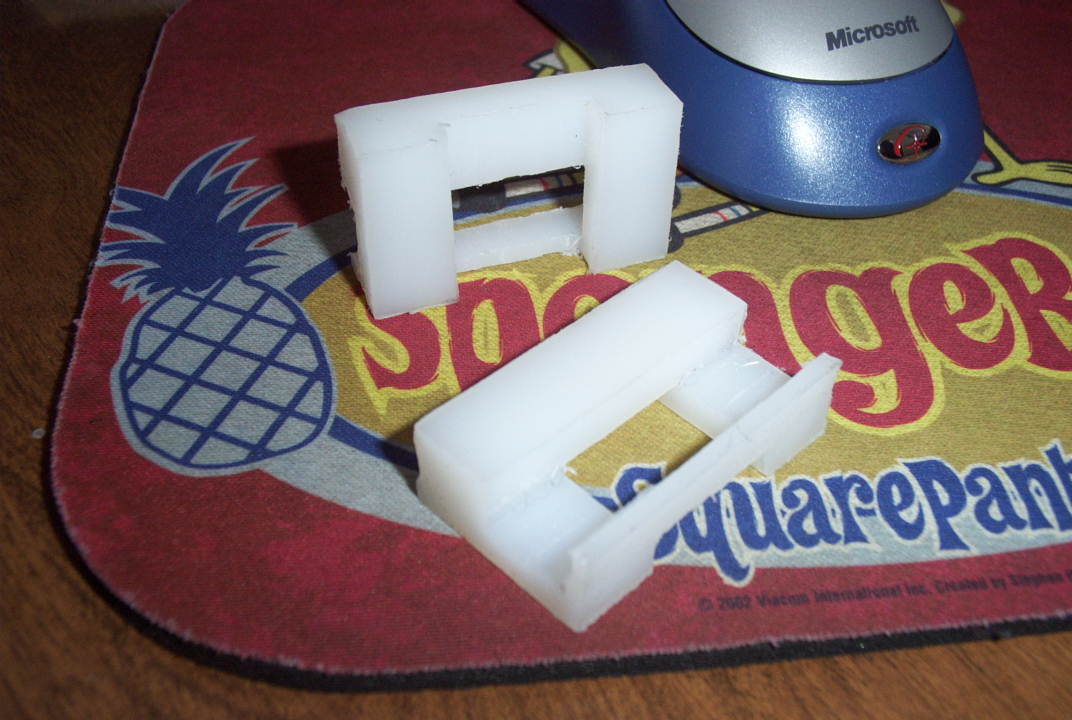 These are the motor mounts I spontaneously made this morning... In this picture, I haven't tapped and drilled the holes yet, and I'm sure you have no idea how they could possibly function as motor mounts. Well, just take my word on it :-)
 Hopefully this picture might clarify the way the mounts work... Basically, a muffler clamp goes in the thin groove, and the motor rests in the wider groove. A bolt then passes through the baseplate and screws into the bottom of the mount. At least that's the plan.
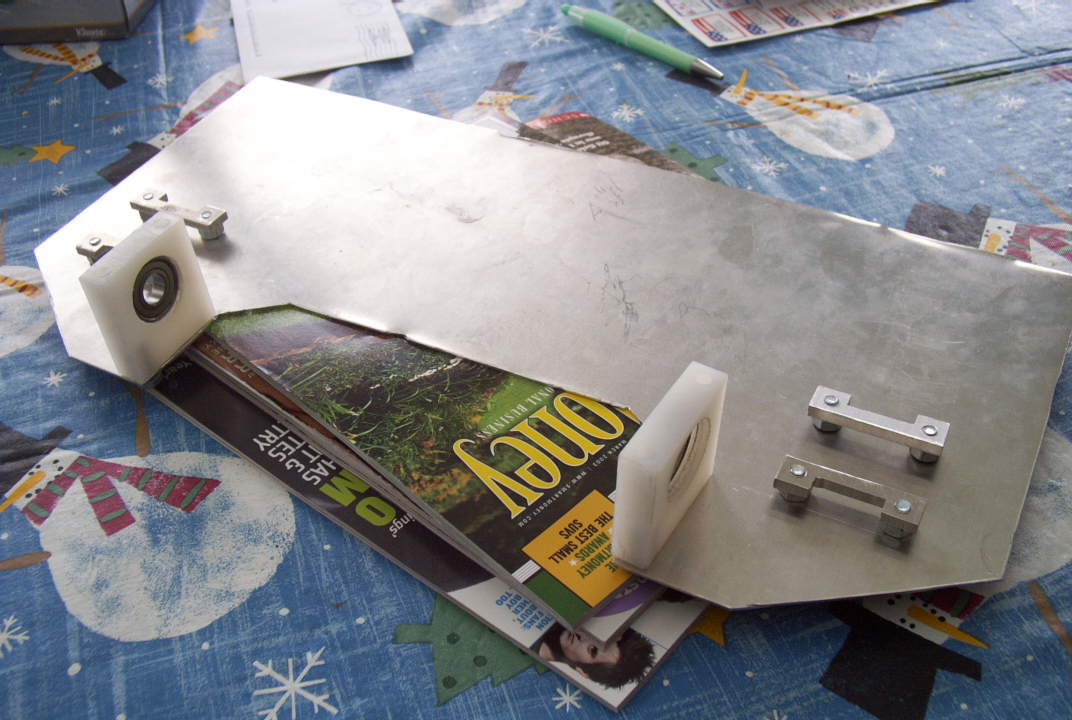
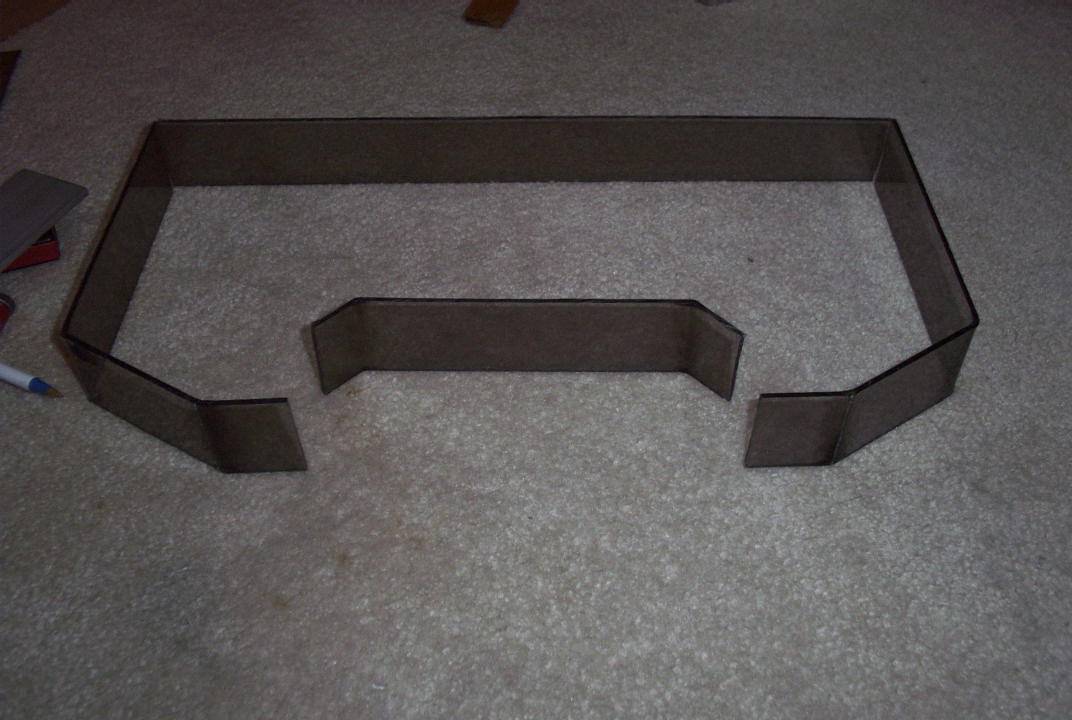
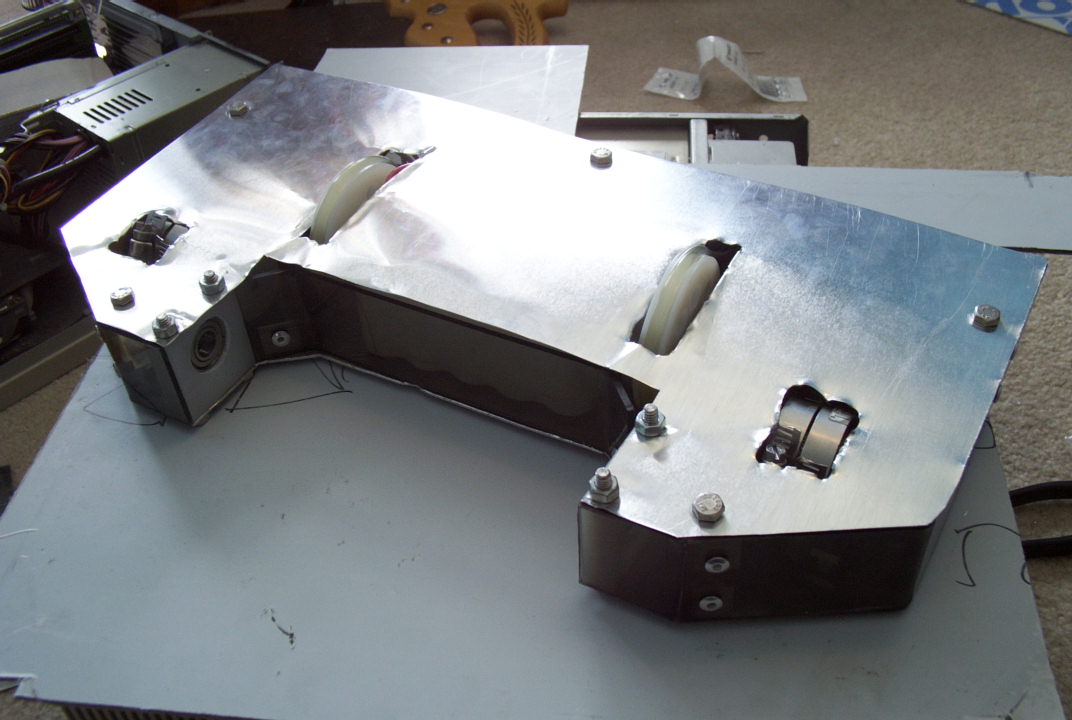
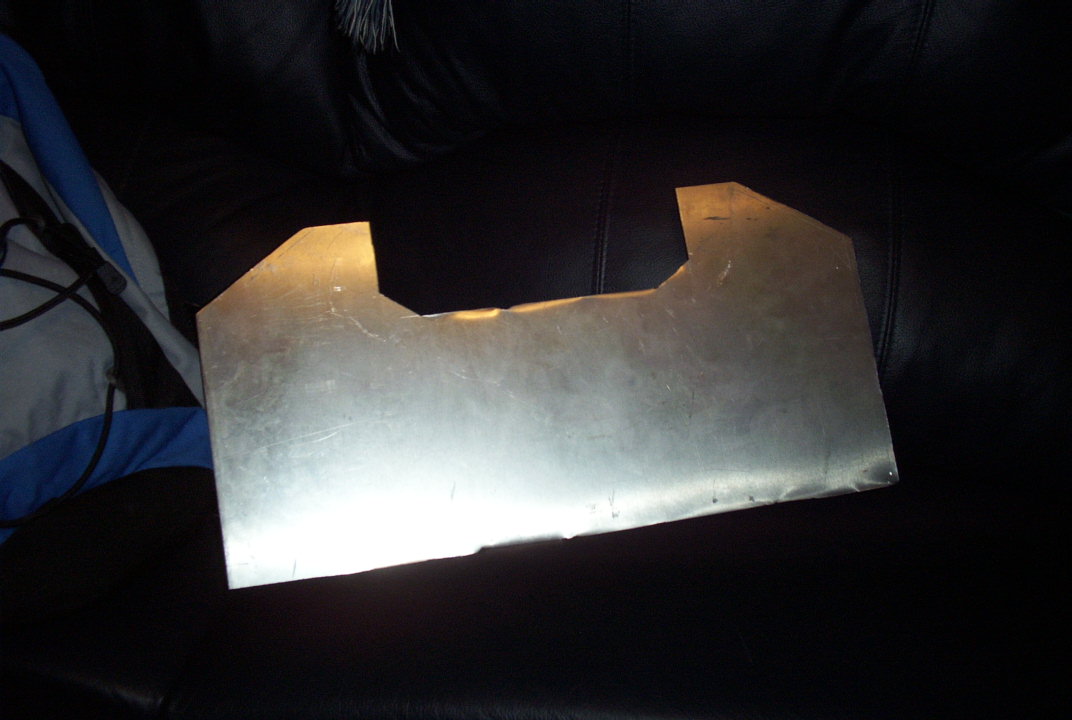 I trimmed 3" of unneeded material off the baseplate, saving �lb. The bot now measures 18" wide x 9" long. If the cuts in the picture look crooked or rough, it's just you. I assure you, the cuts are perfect :-P
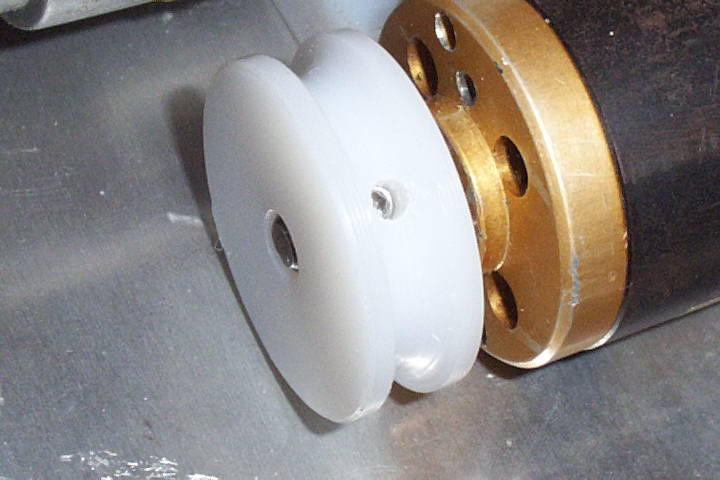
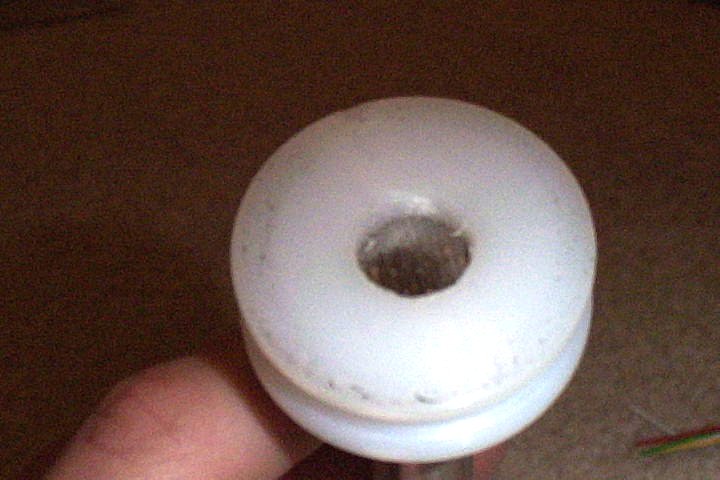 When the temperature in the garage finally got back over freezing, I was able to do some work. This pic is of one of the pulleys for the weapon shaft which I bought from McMaster, but since the bore size only came in �", I had to drill it out to �" with my drill press. They didn't come out exactly on center, but look fairly good, considering my lack of a lathe. (The pic was too dark when I took it, so when I lightened it in PSP, it lost some quality, hence the fuzziness)
 Here's another progress shot... As you can see, I got the Titanium weapon shaft and the pulleys mounted on it... I was still milling the pillow blocks when this pic was taken, so they're not in it.
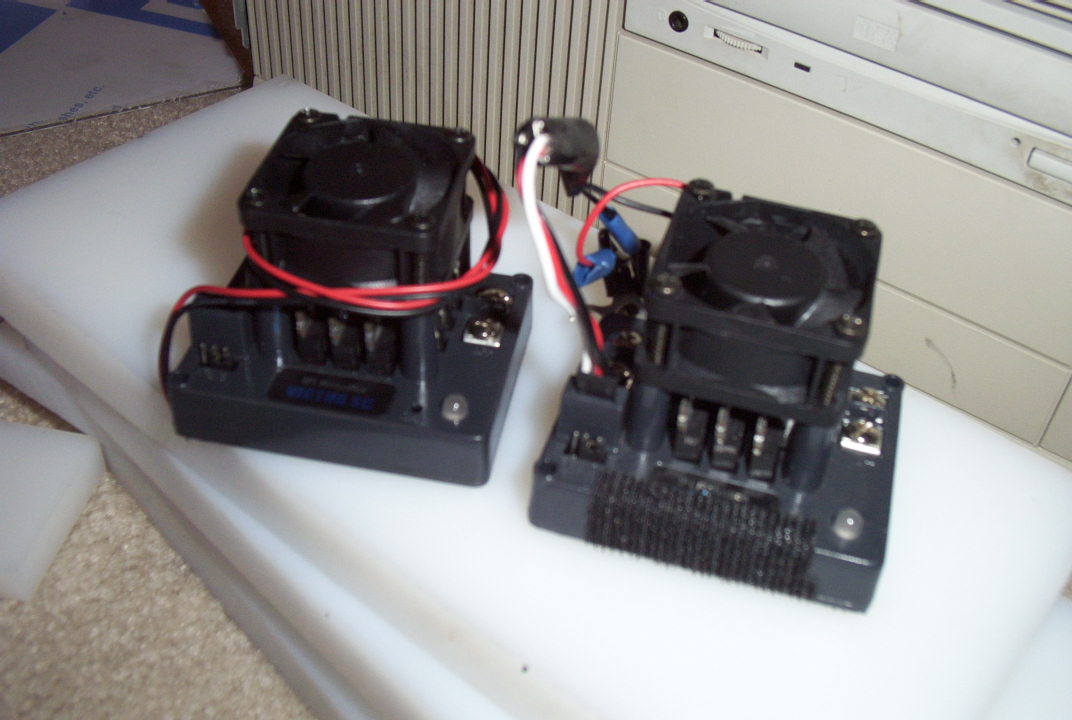 Here is $350 of VSC goodness that arrived today. :) They're also part of the reason I'm in debt, though... Oh well.. sacrifices must be made. =P
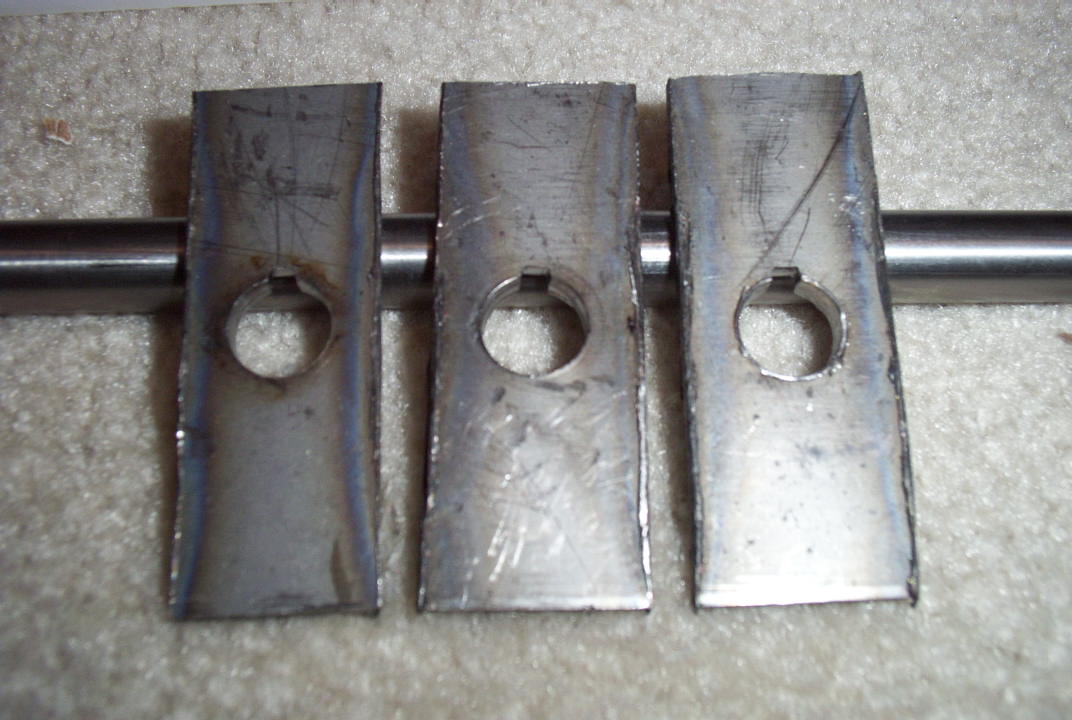
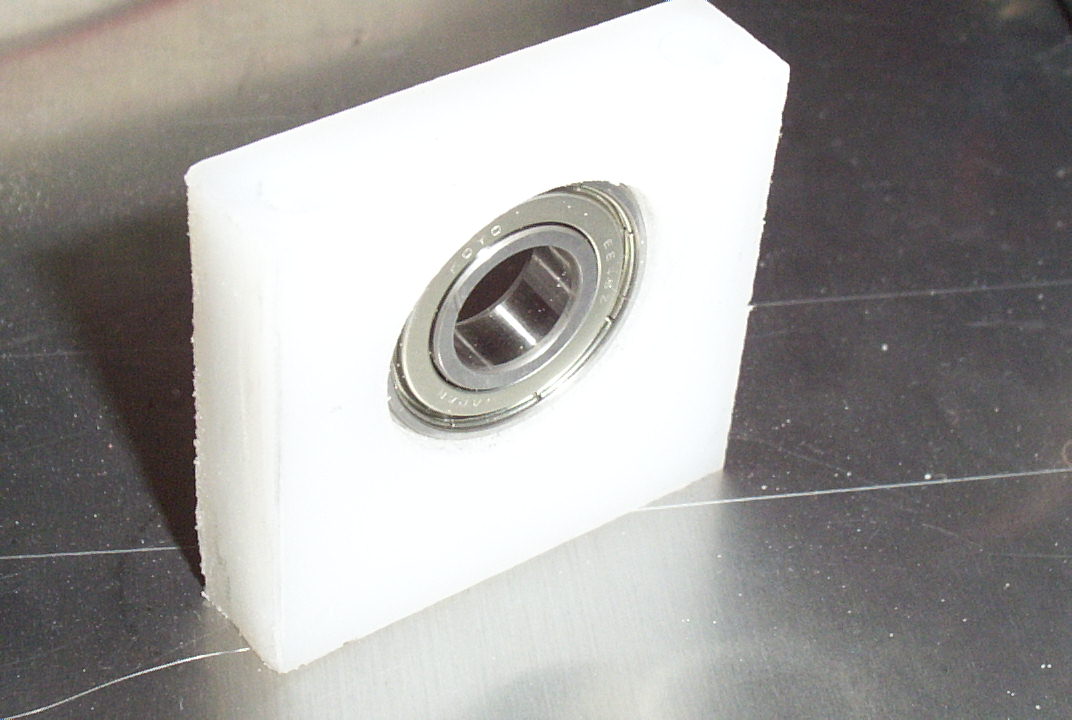 I finally made the pillow blocks, and I think they look pretty snazzy :) I had to "modify" the hole saw to cut the hole for the bearing by removing and/or bending a few of the teeth in so that the bearing would be nice and snug. Mission successful.
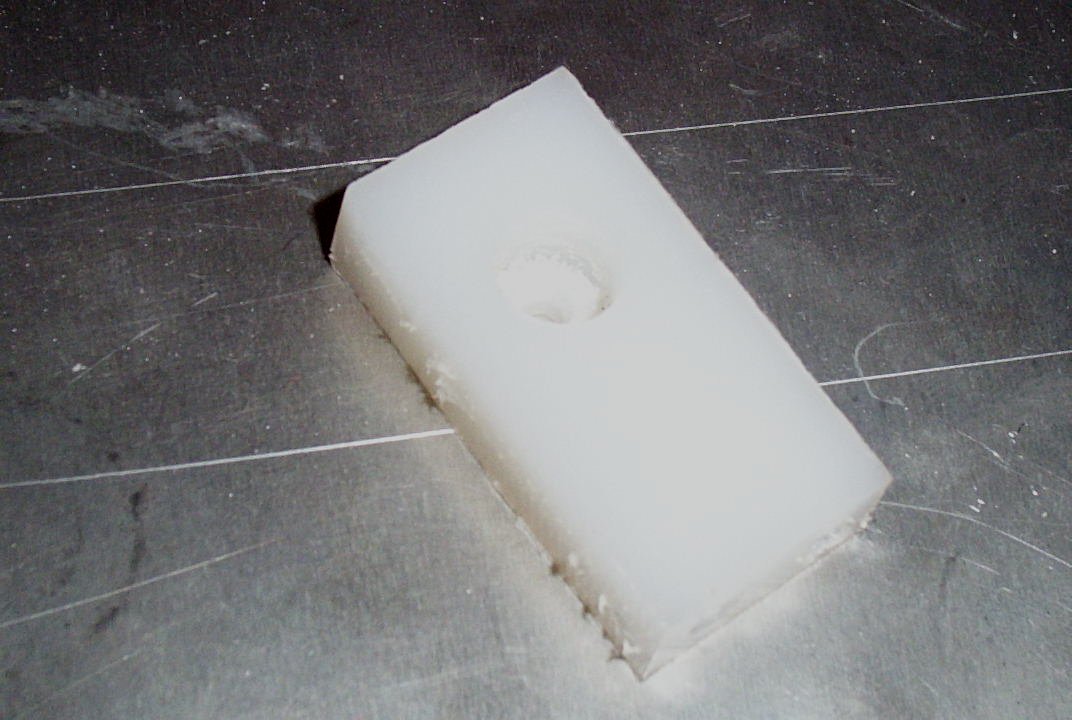 This is a pretty crummy picture of the.. um.. I guess they're pillow blocks, that I made. There's two 1/4"-20 holes drilled and tapped in the bottom of them to hold them to the baseplate. I also drilled a 7/16" hole for the drive motor shafts to rest in.
 After needing to slowly explain what a "tap" was to a Home Depot employee, I finally found one and was able to drill and tap holes for set screws in all four pulleys for the weapon drive.
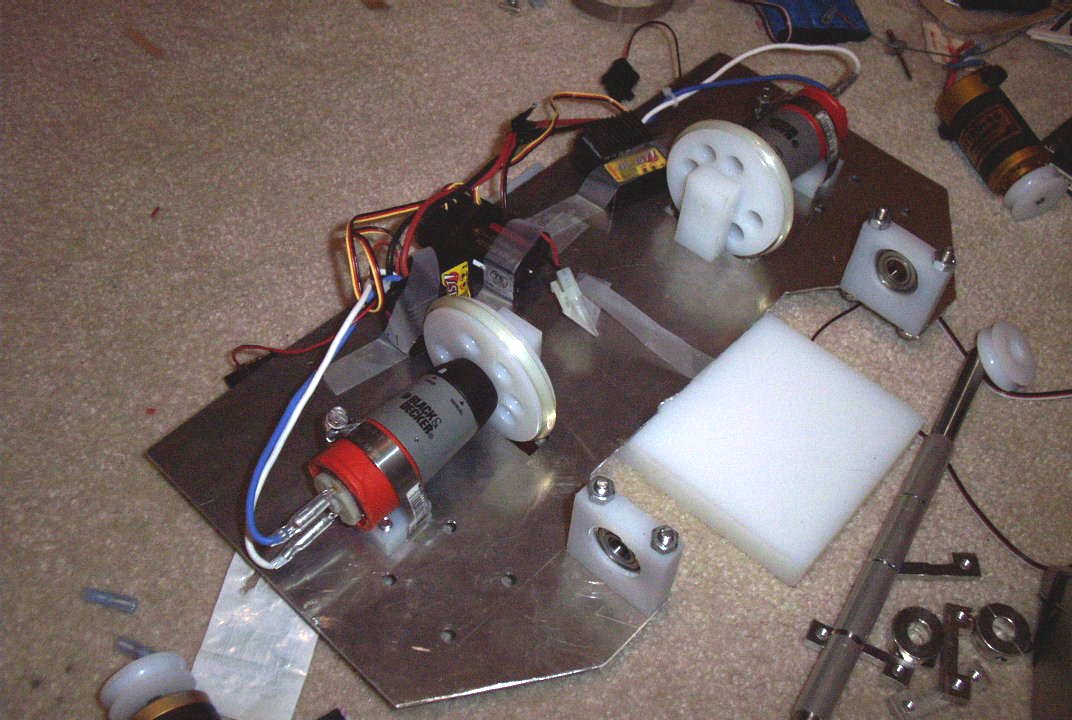
 Here's another one of the boring, repetitive, 'they-all-look-alike' pics of the bot's progress. You can now see the finished pillow blocks for both the weapon and drive systems. Hopefully I should be able to replace the cardboard box with a real battery soon.
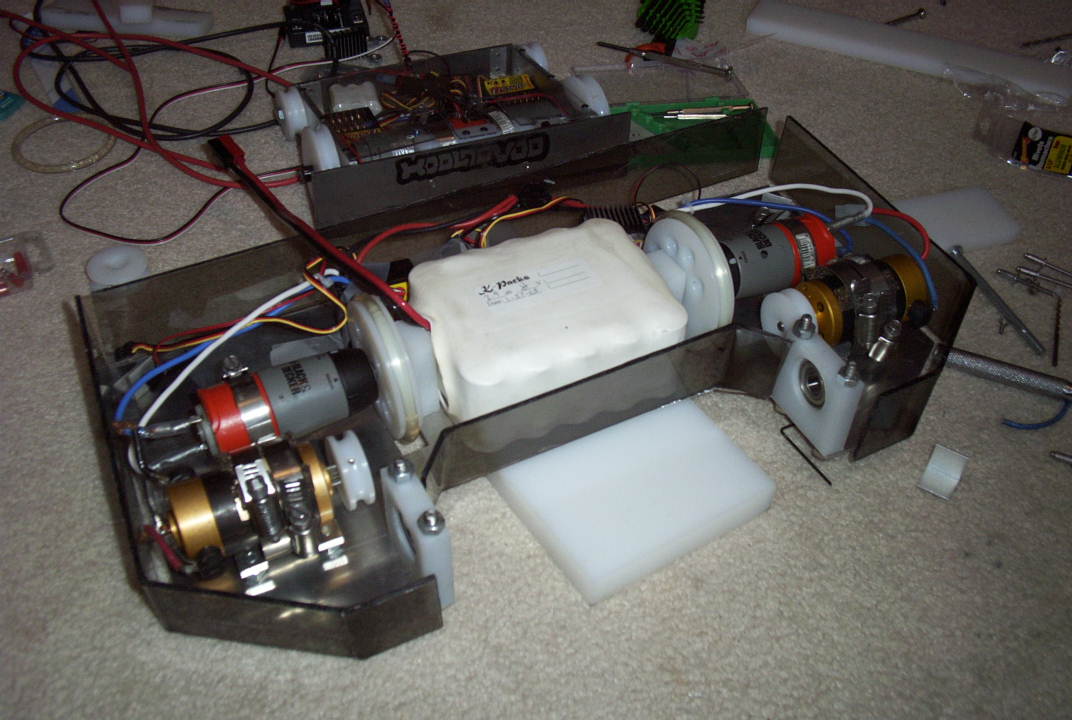
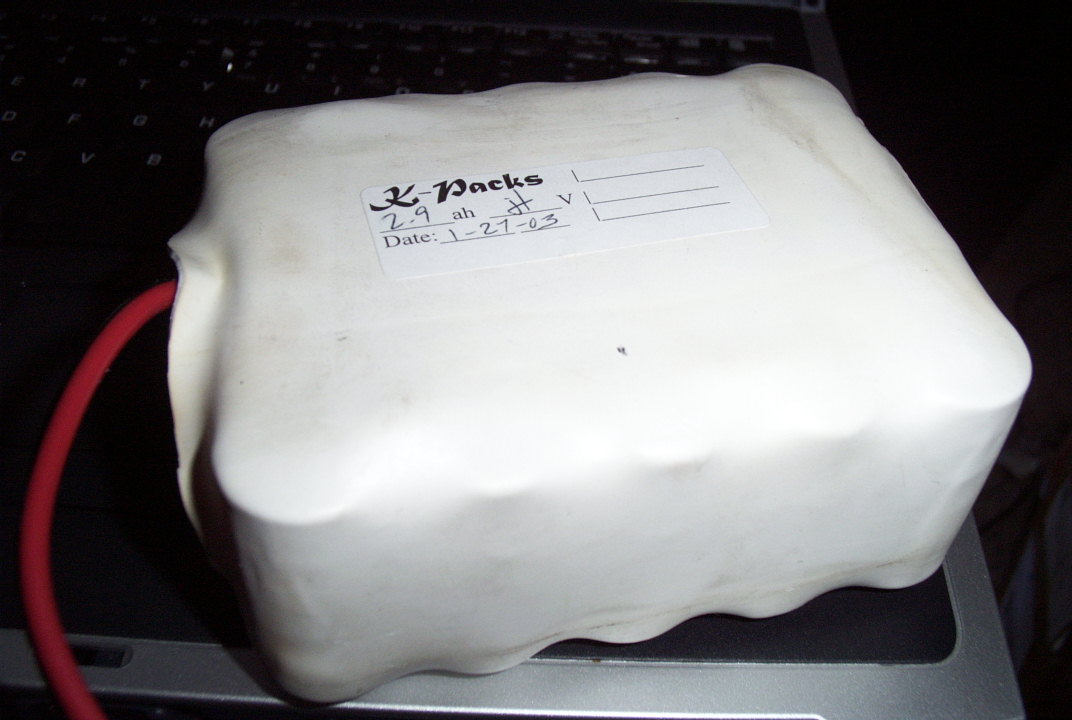 YAY! the K-pack arrived on the same day as the two other McMaster orders. It's like Christmas all over again :) The batt's a wee bit bigger than I expected, but everything should turn out peachy.
 Today I had a snow day and was able to work on the bot for 5 hours straight. This is a shot from halfway through, with the holes for the motor mounts and pillow blocks drilled.
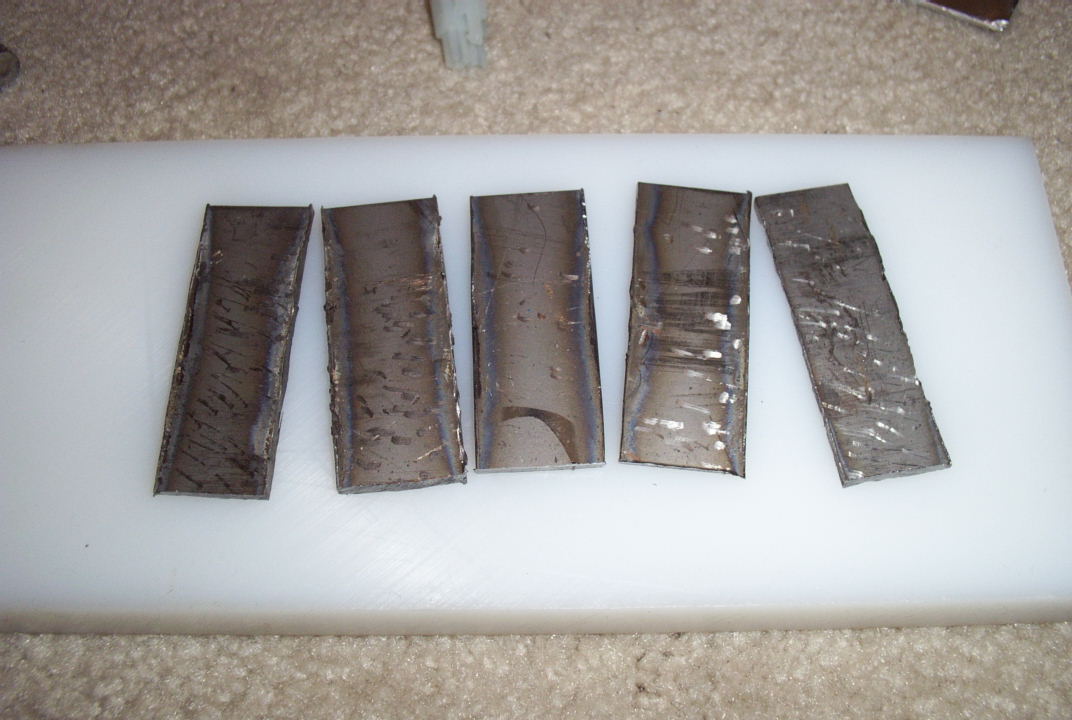 Here are the five ugliest pieces of Titanium you'll ever see. The discoloration is from the heat the chop saw produces, and the marks are from when I was hammering the annoying scrap thingys off the sides of the cut. (Don't worry... after some filing and polishing, they'll look nice and snazzy for Motorama)
 The results of my labor: I got the wheels and pillow blocks attached and milled the slots fir the wheels. Tomorrow I should be able to drive it around. (yay!)
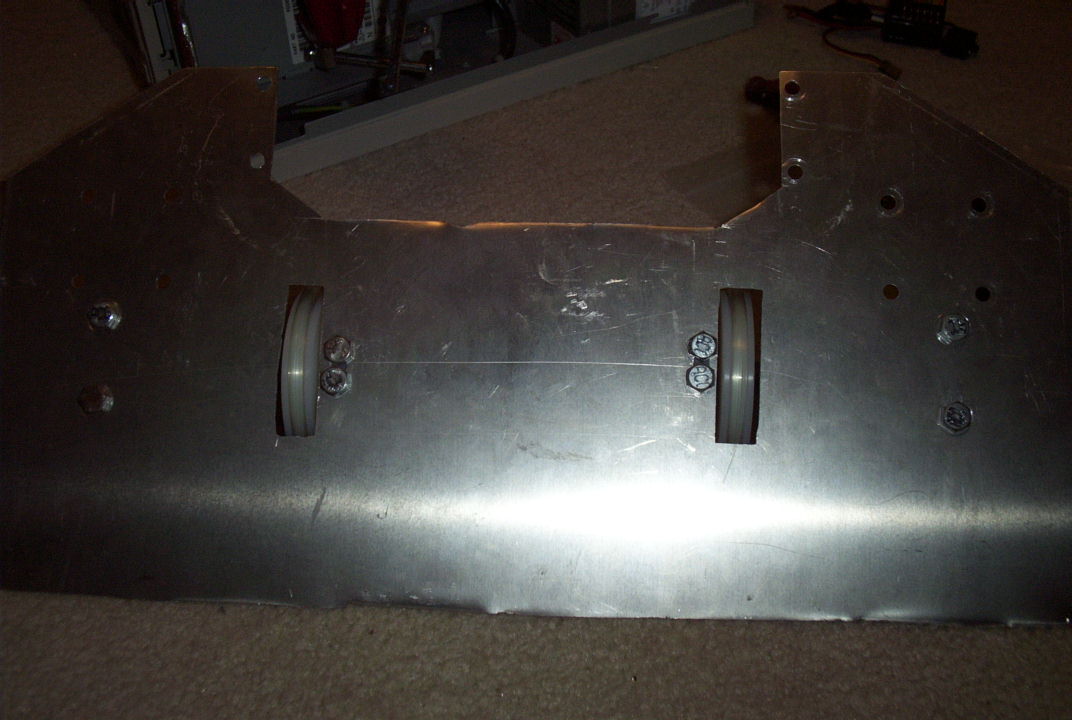 This is kind of a pointless picture.. shows the bottom of the baseplate and the holes for the wheels.
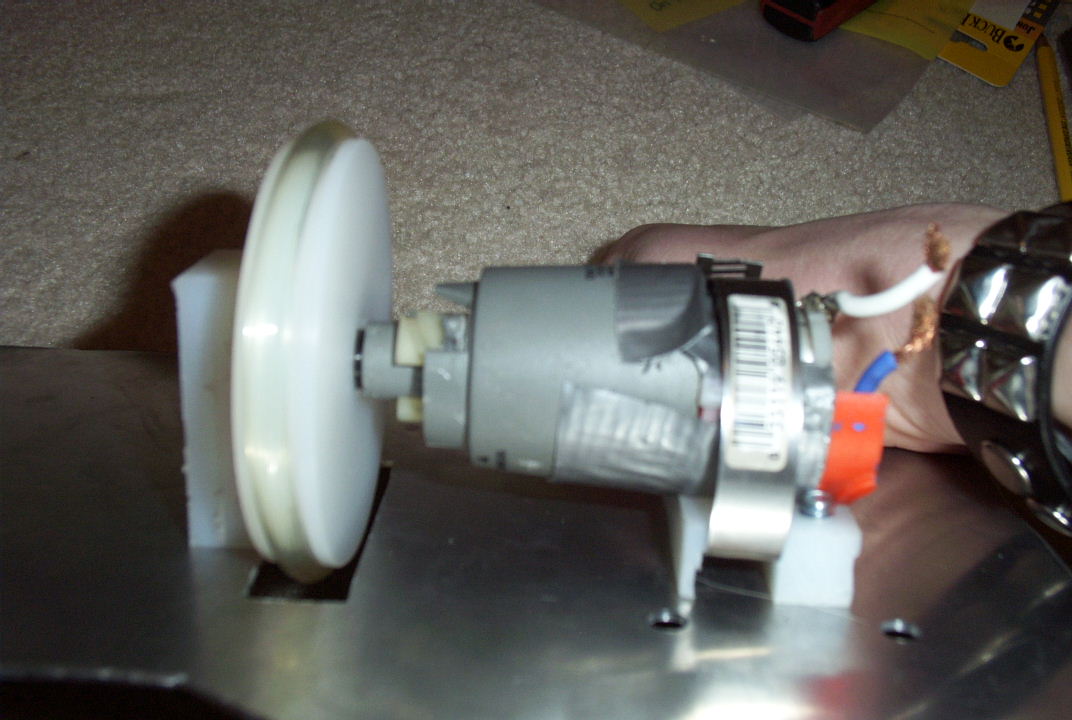 This just shows a view of the drive set up. Not much to see, other than a guest appearance by my hand. (applause)
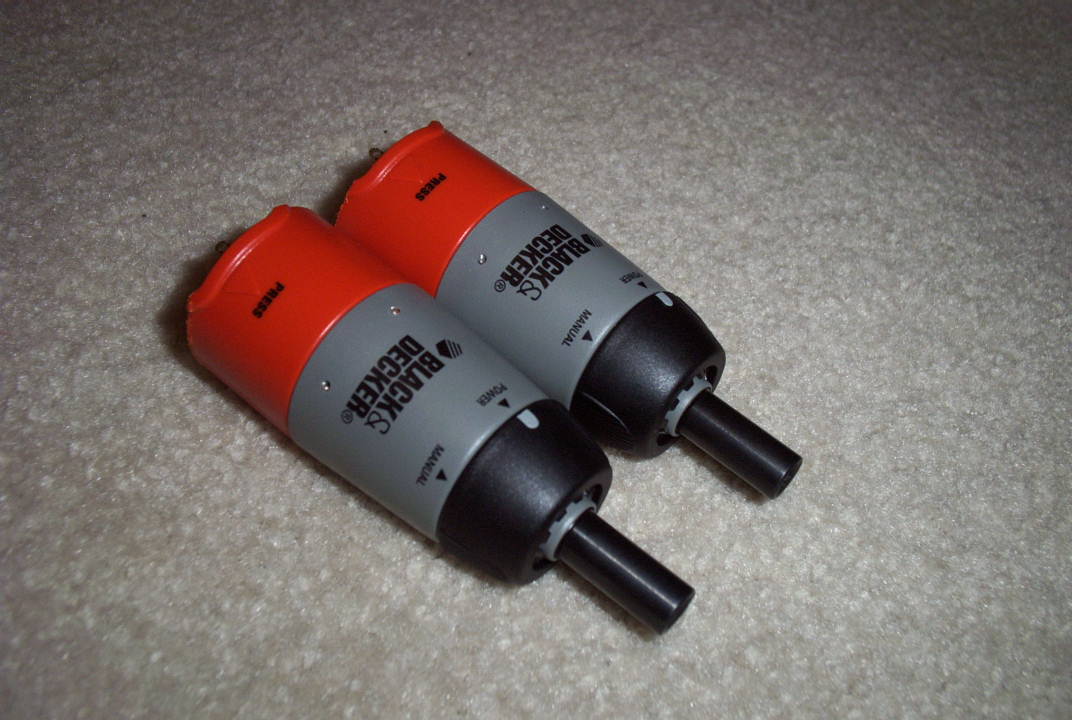 After an unsuccessful test drive, I realized that Tier would be almost completely undriveable with the stage of gears taken out of the gearboxes, so I decided to put those motors in Hooloovoo and bought some new B&D's at Lowes.
 After hooking the new B&D's up, I was able to finally take Tier for a successful test-drive. With the wheels so close together, it's able to turn quickly, which will be pretty important, considering I have such crappy armor...
 I finally made the side armor for Tier, cut out of 1/8" Lexan, then used my "sexy Lexan bending" skills to bend them into the right shape :-P
 Here's the armor in place, prior to mounting. Also in this pic, the Cobalts are finally mounted for the first time. Now I just need to get the darn weapon finished...
 Using a file and some patience, I was able to put some 1/8" keyways into the teeth. They came out surprisingly well.
 Here you can see the result of one of my random fits of insanity... I bought some 0.025" Aluminum flashing from Home Depot and made some top "armor" out of it. This was quickly pointed out to be a bad idea, so...
 ...I made this new top out of 1/8" Lexan. Much nicer. It still doesn't line up perfectly... but it's pretty darn close.
